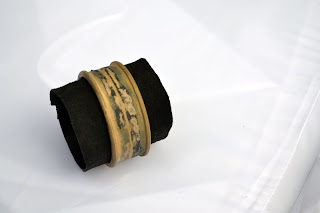
The wooden blank I am using has been covered in the past, but my darling dog Rupert decided he needed to taste it. I have removed the old leather and sanded it back as best i could.
Next i cut a piece of soft sheep skin. It is going to be stuck to the inside of the bangle then wrapped around the edges of the bangle to meet in the middle.. When measuring, make sure the leather in long enough to over lap about 1cm. If there is not enough over lap, it will pull apart in the next step. Very carefully skive the short ends that are going to over lap. The finer the skiving, the better it will look and the join won't be seen.
Next I glue the sheep skin to the inside of the bangle. I put the glue on the inside of the bangle and not all over the leather, but I do put the glue on the ends of the leather that are going to be over laped. Carefully centre the leather and stick to the inside of the bangle. Allow the glue to completely dry otherwise the over lap will pull apart in the next step. It should now look like this.
Now comes the hardest bit. The leather has to be pulled back over the wooden edge. I start at the join as this is the weakest point. It is quite tricky to do, but it can be done. Work your way around, doing a bit at a time. It has to be pulled really tight otherwise there will be wrinkles. After i get it all rolled over, I go around and pull it even tighter!!!! I then use my fingers to press the leather down under the ridge. In a perfect world the edges would line up nice and evenly but I just trim at this stage. I then go back and put some glue under the leather. As you can see mine is a bit messy, but it is going to be covered by three more layers of leather. It now looks like this.
Next I cut two strips of leather that are going to give the bangle a nice domed shape. One is smaller than the other. The larger one should not go right to the inside edge of the ridge . I skive all the edges.
Next I glue the thinnest one first. Remember to stagger the joins around the bangle.
Now i glue the second strip. Notice it doesn't go right up to the edge.
Now its time to decide what the top layer will be. I am using a piece of croc embossed leather. Remember to skive all the edges.
Now its time to stick the final layer on. Make sure that the glue is spread right to the edges. I have used contact cement for this top layer as the leather is quite firm. You can see in the picture below that the edges have not been pressed down yet. This is the final step. Using either your fingers, modelling tool or bone folder, go around the edges and press very firmly under the ridge.
Here it is all finished with all the edges pressed down.
And now I can wear it!!!


